Create or Assign Cards
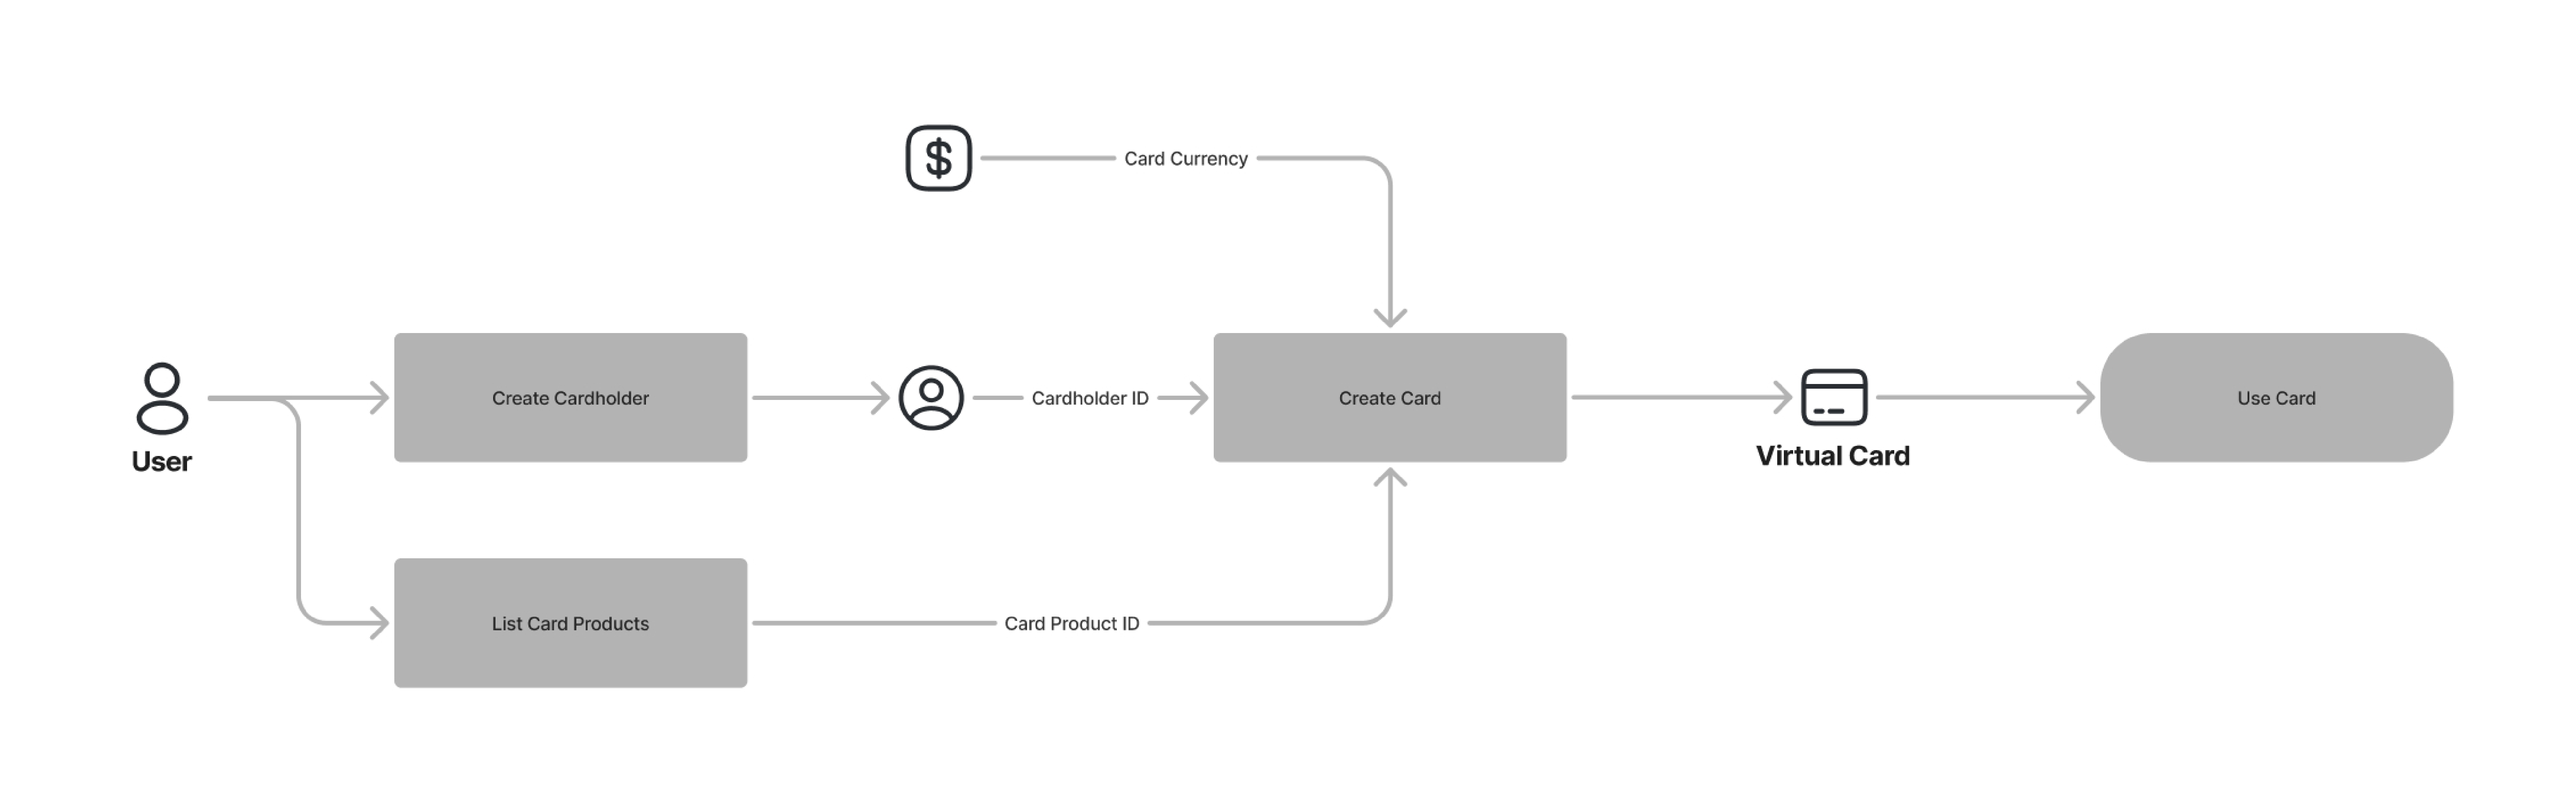
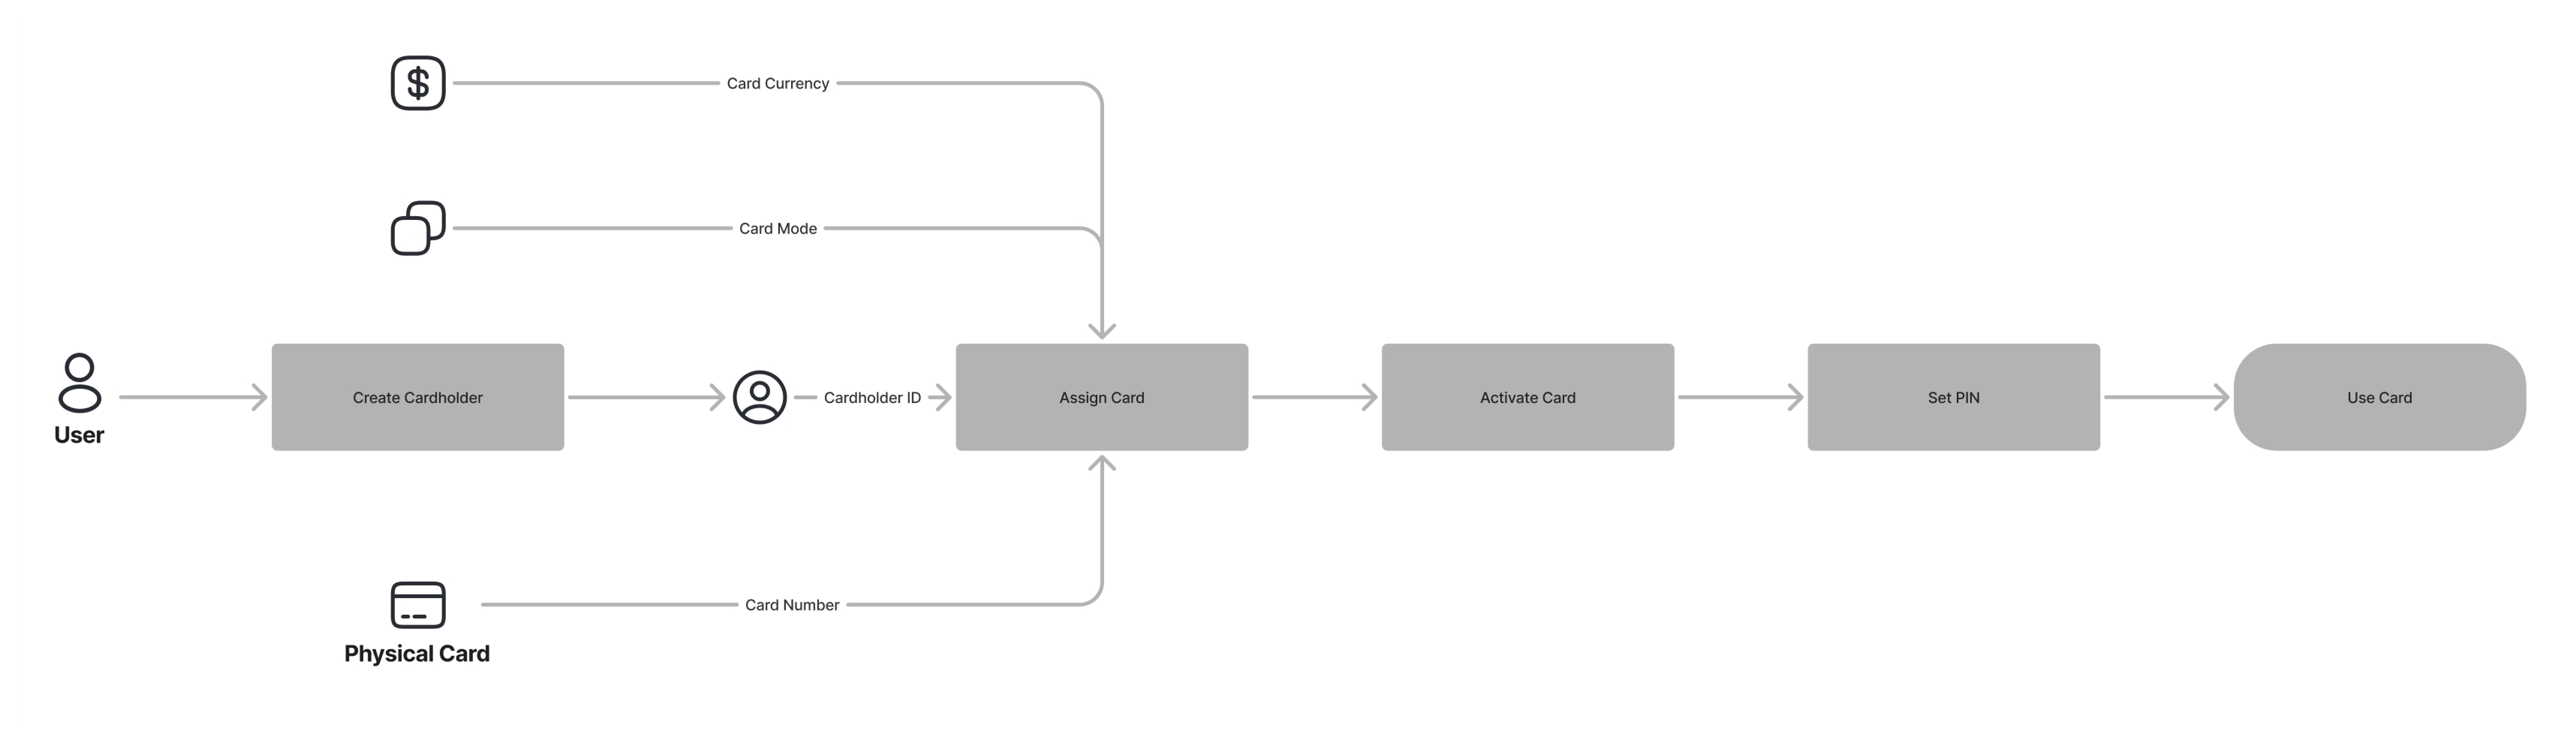
You can issue virtual or physical cards to your cardholders via the Dashboard or API. Use the Assign Card function to provide physical cards to your users, or **Create Card **function to apply for new virtual cards.
Virtual Card: Cards with no physical representation, but it includes all the card information needed for digital transactions, such as the PAN, expiration date, and CVV.
Physical Card: Physical cards, made of plastic, will be delivered to cardholders. Cardholders must receive and activate their physical cards before they can perform transactions.
Create Card
Create Card in the Dashboard
- Navigate to the Cards > My Cards page.
- Click Create Card in the top-right corner.
- Enter the card details as required.
- In the cardholder dropdown, select the cardholder you created in the previous step.
- Click Confirm.
Create Card Using the API
Request example
curl --request POST \
     --url https://api.sandbox.uqpay.tech/api/v1/issuing/cards \
     --header 'accept: application/json' \
     --header 'content-type: application/json' \
     --header 'x-auth-token: eyJhbGciOiJIUzI1NiIsInR5cCI6IkpXVCJ9.eyJtYXN0ZXJfaWQiOiIwIiwiY3VzdG9tZXJfaWQiOiJjZWRjYjE0MS0xM2IwLTRlMzItOTlkZC00MzQ1NWI1M2Q3MzciLCJhY2NvdW50X2lkIjoiY2VkY2IxNDEtMTNiMC00ZTMyLTk5ZGQtNDM0NTViNTNkNzM3IiwiYXBpX3ZlcnNpb24iOiJWMS4wIiwiY2xpZW50X2lkIjoialB5a1BlR1NNMWtSMGx0YmV5VGU3TiIsInVzZXJfaWQiOiJqUHlrUGVHU00xa1IwbHRiZXlUZTdOIiwiZW1haWwiOiIiLCJzY29wZSI6IiIsInVzZXJfbmFtZSI6IlRlc3QiLCJkaXJlY3RfaWQiOiIwIiwib25fYmVoYWxmX2lkIjoiIiwib25fYmVoYWxmX25hbWUiOiIiLCJidXNfdHlwZSI6MCwiaXAiOiI0My4xOTguMTUyLjc0IiwiZXhwIjoxNzM1ODk3MTA3LCJpc3MiOiJ1cXBheSJ9.V5nnals8t95yOGMqUe4wHS9EUyew_2k1AdZYTGXzNG8' \
     --header 'x-idempotency-key: 10100f72-f4de-4f9c-bb8e-ec7d1c4f32be' \
     --data '
{
  "card_currency": "USD",
  "card_limit": 1000,
  "card_product_id": "41e4933f-5eb0-4ad4-86f3-2845a3206d3b",
  "cardholder_id": "1911292b-67e4-4ee9-87d7-a8a6c7cb1af7",
  "spending_controls": [
    {
      "amount": 5,
      "interval": "PER_TRANSACTION"
    }
  ]
}
'
Response example
{
  "card_id": "f3703ef0-f9cb-429c-93fe-5cb435cc1d96",
  "card_order_id": "5bca4d5c-d085-460f-8852-b713ad7b4a48",
  "card_status": "PENDING",
  "create_time": "2025-01-03T17:23:15.076054269+08:00",
  "order_status": "PROCESSING"
}
Assign Card
When you receive a bulk card order, the next step is to assign the cards to individual cardholders. After assignment, the cardholder can receive and activate their physical card for use. Keep in mind that once a card is linked to a cardholder, it cannot be reassigned.
Assign Card in the Dashboard
- Navigate to the Cards*>*My Cards page.
- Click Assign Card Button.
- Fill out the relevant information.
- Assign the card to a specific cardholder.
- Click Confirm.
Assign Card Using the API
Request example
curl --request POST \
     --url https://api.sandbox.uqpay.tech/api/v1/issuing/cards/assign \
     --header 'accept: application/json' \
     --header 'content-type: application/json' \
     --header 'x-auth-token: eyJhbGciOiJIUzI1NiIsInR5cCI6IkpXVCJ9.eyJtYXN0ZXJfaWQiOiIwIiwiY3VzdG9tZXJfaWQiOiJjZWRjYjE0MS0xM2IwLTRlMzItOTlkZC00MzQ1NWI1M2Q3MzciLCJhY2NvdW50X2lkIjoiY2VkY2IxNDEtMTNiMC00ZTMyLTk5ZGQtNDM0NTViNTNkNzM3IiwiYXBpX3ZlcnNpb24iOiJWMS4wIiwiY2xpZW50X2lkIjoiQ2tDNDNtUG84c1Fmb0RzZmk3dXluciIsInVzZXJfaWQiOiJDa0M0M21QbzhzUWZvRHNmaTd1eW5yIiwiZW1haWwiOiIiLCJzY29wZSI6IiIsInVzZXJfbmFtZSI6IlRlc3QiLCJkaXJlY3RfaWQiOiIwIiwib25fYmVoYWxmX2lkIjoiIiwib25fYmVoYWxmX25hbWUiOiIiLCJidXNfdHlwZSI6MCwiaXAiOiIxOC4xNjIuMTMzLjI0MSIsImV4cCI6MTczNjE1Mzc0NywiaXNzIjoidXFwYXkifQ.DViJJDOW4WT3xwgbApnChBvZLO3nfNXumdmTROOROzE' \
     --header 'x-idempotency-key: 18473f72-f4de-4f9c-bb8e-ec7d1c4f32be' \
     --data '
{
  "card_mode": "SINGLE",
  "cardholder_id": "acba8e35-c3f0-4ff9-a9f4-0fc5eb40293d",
  "card_number": "4937240100109040",
  "card_currency": "USD"
}
'
Response example
{
  "card_order_id": "f1aec8ac-48c0-43a2-a3e8-4c315bae5526",
  "card_id": "ea2e03ba-c171-4287-b893-fb314a892280",
  "card_status": "PENDING",
  "amount": "0",
  "order_status": "PENDING",
  "create_time": "2025-01-06T15:56:03.699926036+08:00",
  "update_time": "0001-01-01T00:00:00Z"
}
Updated 6 months ago